Jira Webhooks?
A Jira webhook is a user-defined callback over HTTPS that allows applications to receive real-time notifications when specific events occur. In the context of Jira, webhooks serve as a communication bridge between your Jira instance and external applications or web services. Rather than relying on periodic polling of Jira’s REST APIs to check for updates, webhooks enable instant notifications whenever predefined events occur within Jira.
A webhook in Jira serves as a user-defined callback over HTTPS, enabling real-time notifications when specific events occur within the system. When registering a webhook, you provide essential information, including:
- A name for the webhook
- The URL where the callback should be sent (HTTPS only)
- Optional scope, defining the subset of issues for which the webhook should trigger
- The events to post to the URL
Webhooks can be registered using various methods, such as creating them in Jira Administration, declaring a webhook module in the descriptor of your Atlassian Connect app, or utilizing the REST API.
Benefits of Using Jira Webhooks:
-
Real-time Notifications: Say goodbye to manual checks and periodic polling. With webhooks, you receive instant notifications the moment relevant events occur in Jira, ensuring timely awareness of important updates.
-
Reduced Server Load: By eliminating the need for continuous polling of Jira’s REST APIs, webhooks reduce server load and improve overall system performance, resulting in a more efficient and scalable workflow.
-
Enhanced Automation: Seamlessly integrate Jira with your existing toolchain or workflow automation platforms. Webhooks provide the flexibility to automate tasks and streamline processes based on real-time events within Jira.

How to Set Up Your Webhooks
Understanding Webhook Registration
Before Jira can execute your webhook, it must be registered within the system. During the registration process, you’ll need to provide the following information:
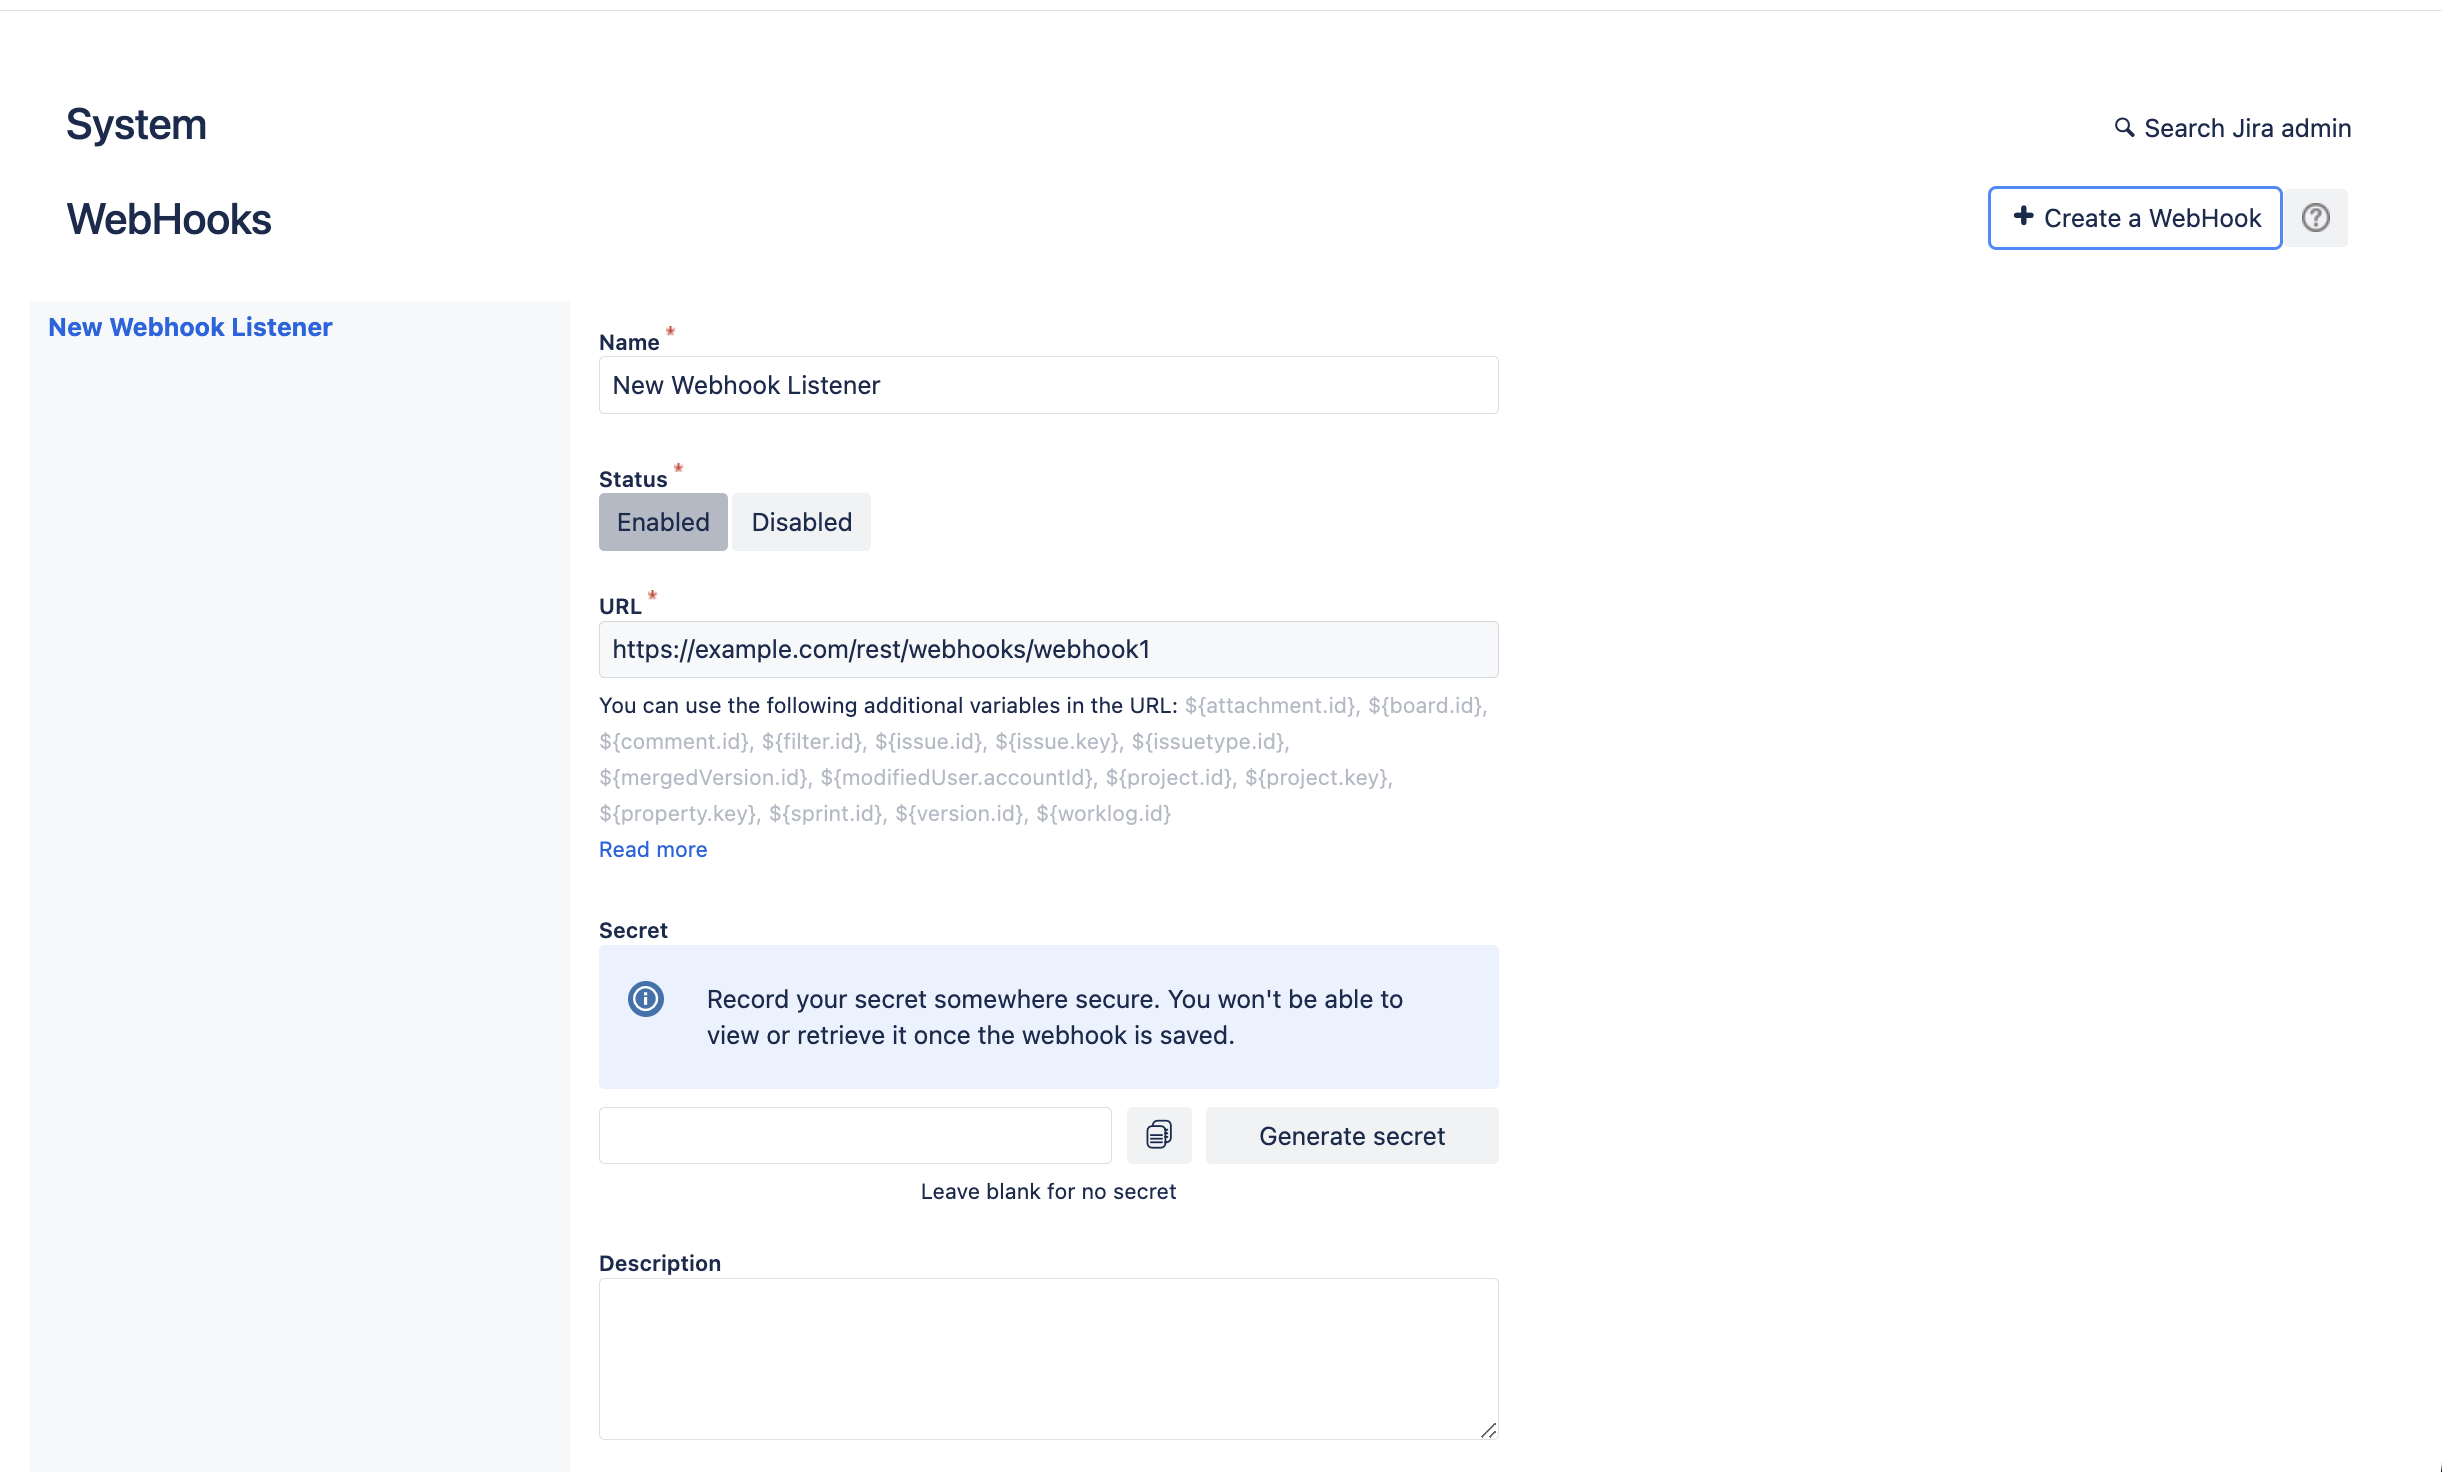
- Name: A descriptive name for the webhook, making it easy to identify within your Jira instance.
- Status: Determines whether the webhook is enabled or disabled.
- URL: The endpoint where Jira will send notifications. This URL can include dynamic variables to pass event-specific data.
- Description (Optional): Additional details about the webhook for reference purposes.
- Events: Specifies which events will trigger the webhook. You can configure multiple events for a single webhook.
Registering a Webhook via the Jira Admin Console
If you’re registering a custom webhook within your Jira instance, the Admin Console provides a user-friendly interface for this task. Here’s how to do it:
- Log in to your Jira instance.
- Navigate to the Admin Console by opening the settings menu in the top right corner and selecting “System” under the “JIRA SETTINGS” section.
- In the left menu, scroll down and select “WebHooks” under the “ADVANCED” section.
- Click on the “Create a WebHook” button to initiate the registration process.
- Specify a name for the webhook and set the status to “Enabled.”
- Generate a webhook URL using a tool like Request Bin and paste it into the URL field.
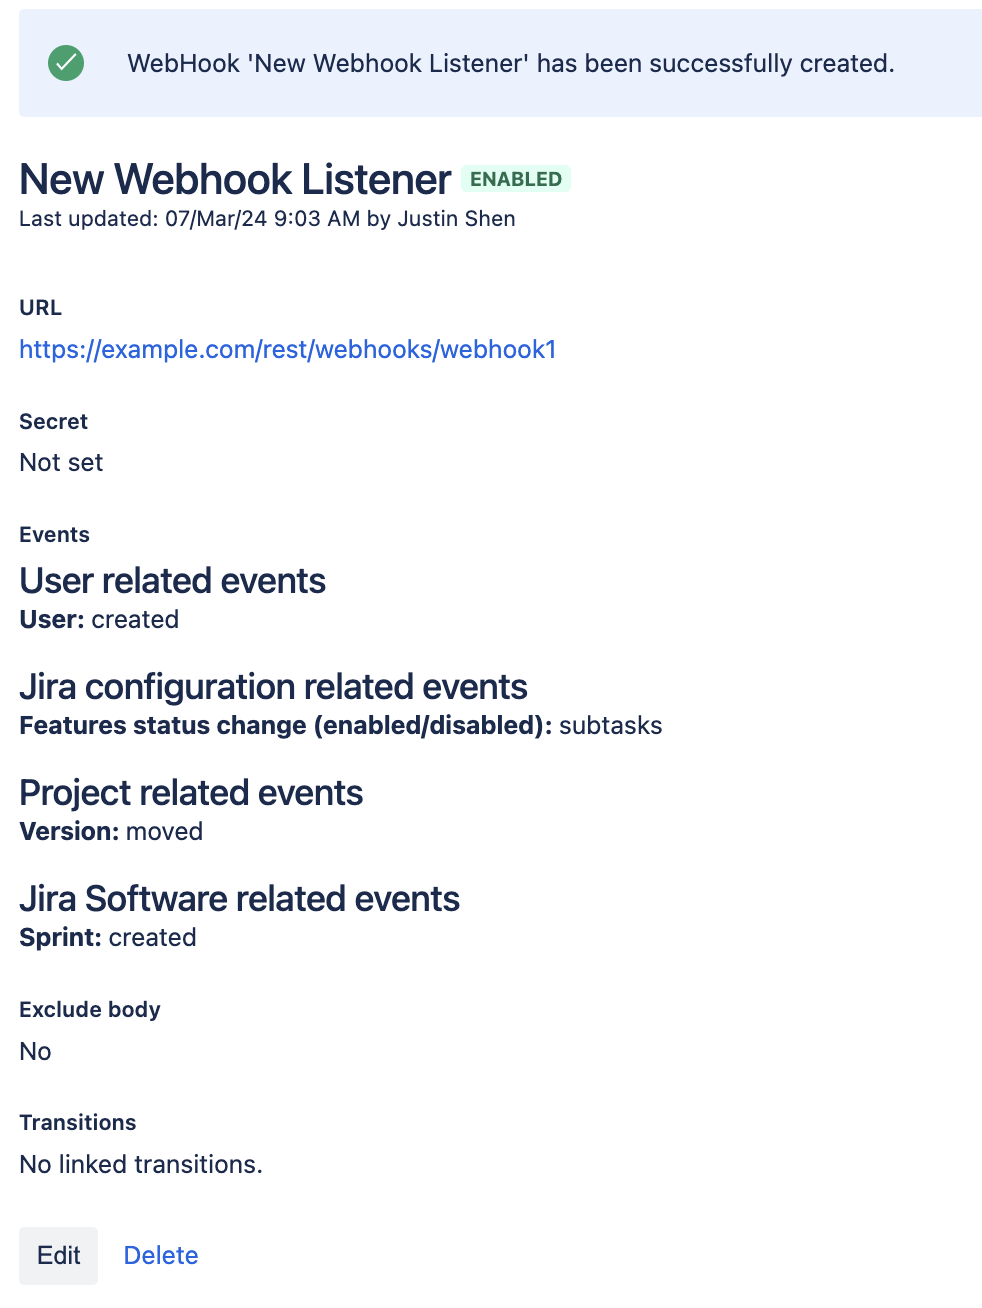
- Select one or more events that should trigger the webhook.
- Click “Create” to finalize the registration of your webhook.
By following these simple steps, you can seamlessly integrate external applications or services with your Jira instance, enabling automated workflows and real-time notifications for key project events.

Setting up Automated Webhooks in Jira
Here’s a step-by-step guide to automating Jira webhooks and maximizing the potential of your project workflows:
- Log in to Jira: Access your Jira instance using your credentials.
- Navigate to Project Settings: Open the settings menu located in the top right corner of the screen and select “Projects” under the “Jira Settings” section.
- Select Your Project: Choose the project for which you want to set up the automation.
- Access Automation Settings: In the menu on the left side of the screen, select “Project settings” and then “Automation.”
- Create a New Automation Rule: Click on the “Create rule” button to initiate the creation of a new automation rule.
- Choose Trigger Event: Select the event that should trigger the automation. For example, you can choose to trigger the automation whenever someone comments on an issue.
- Build the Automation: Use the “Add component” link to add different conditionals and actions to your automation. This allows you to customize the workflow based on specific criteria.
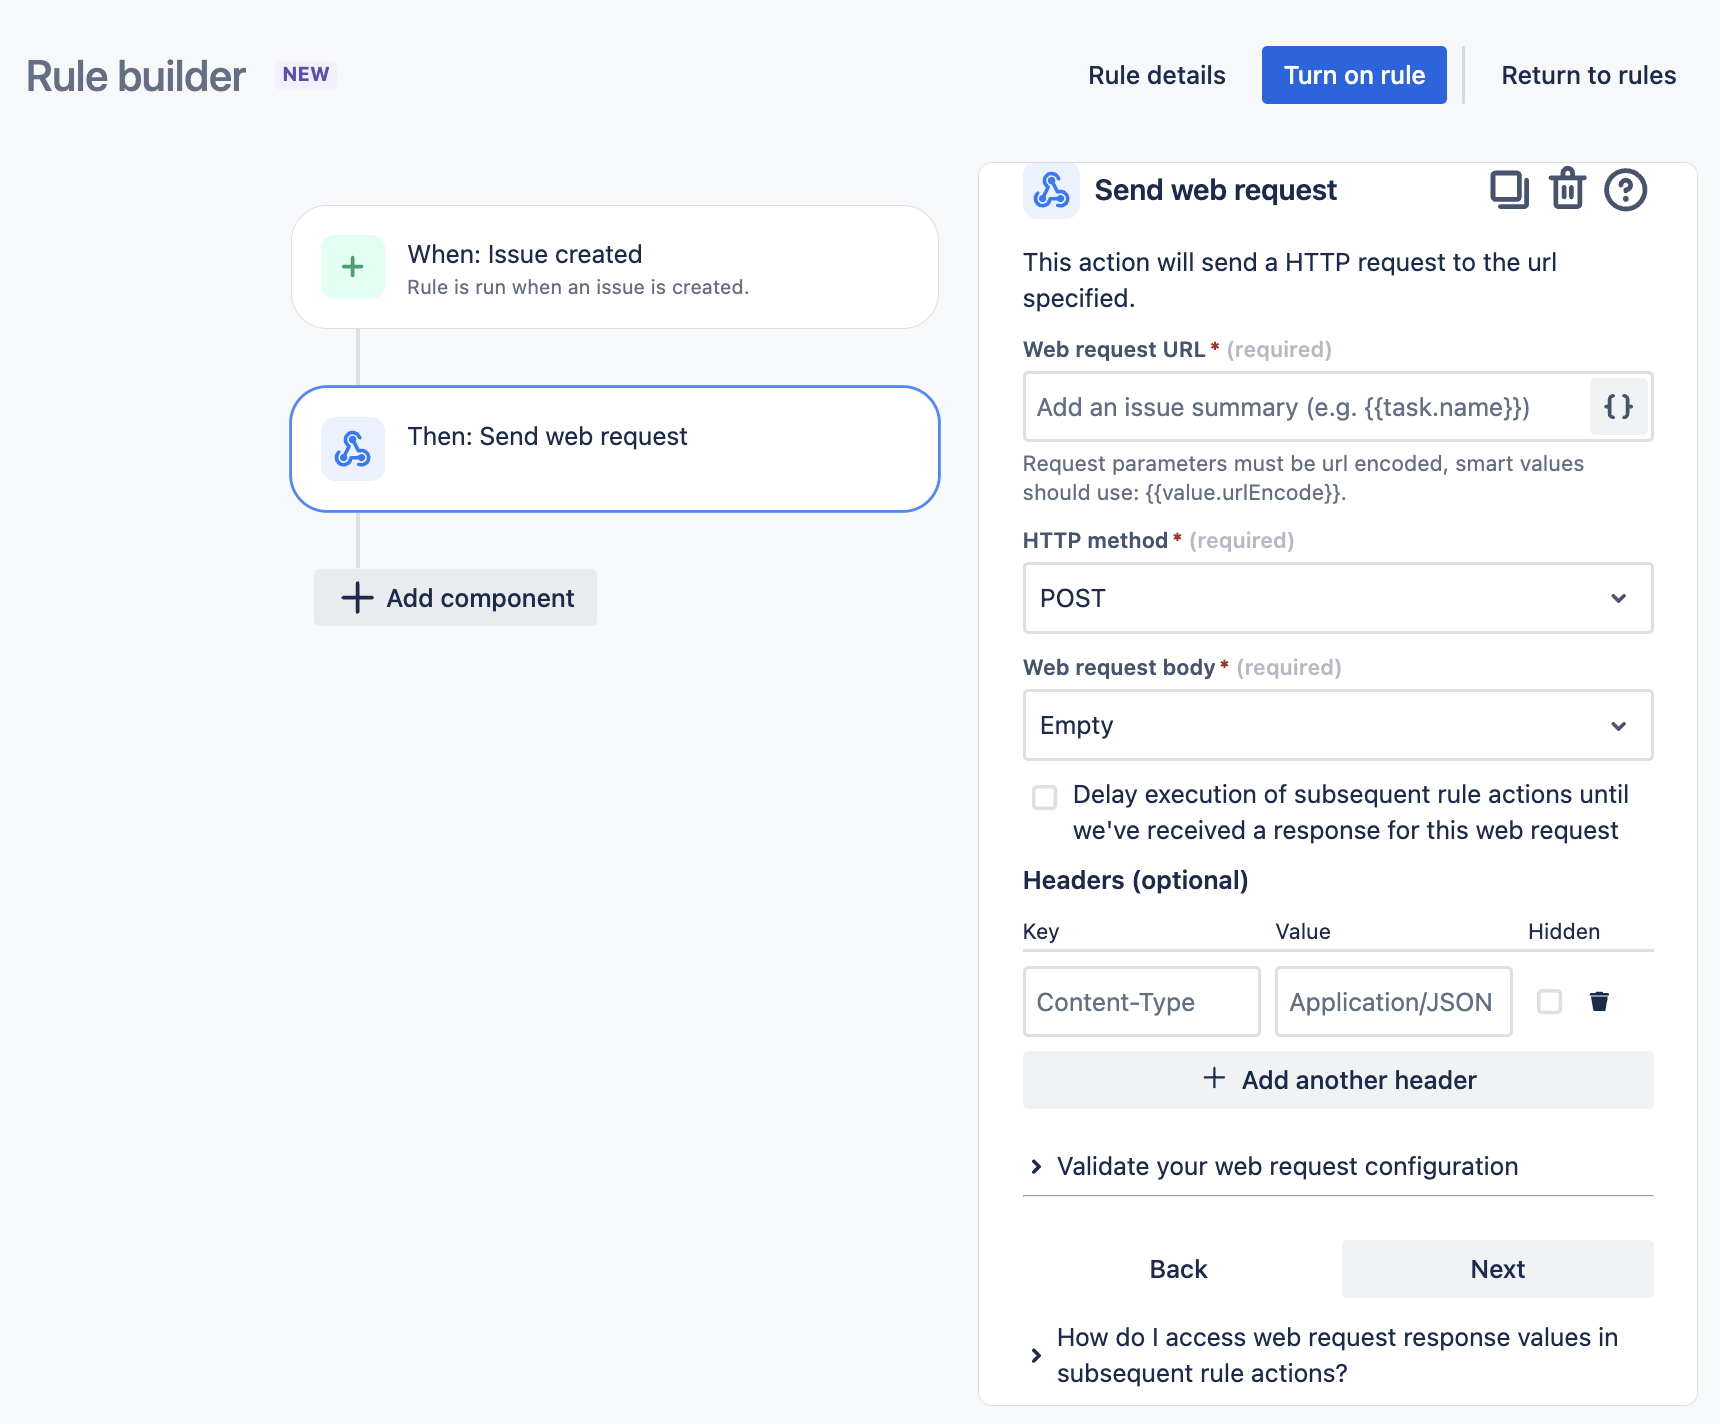
- Add Webhook Action: Click on “Add component” and search for the “Send web request” action. Select it to add the webhook action to your automation.
- Configure Webhook Action: Specify the webhook URL in the URL field. You can generate a test webhook URL using tools like Request Bin. Configure headers and body for the web request, and choose whether to wait for a response from the webhook before continuing.
- Save and Enable Automation: Give your automation a descriptive name and click “Turn it on” to save and enable the automation.
- Save Action: Save the action to finalize the setup of the automated webhook.

If you found this useful check out this article from Atlassian too!
Thanks for visiting, click here to learn more about out our Atlassian Cloud Services!
