Intro Custom Email Automation
Effective communication is the lifeblood of any successful project, and in the world of project management, Jira is a powerhouse. With its versatile automation capabilities, Jira simplifies complex tasks, and one such task is sending custom emails.
In this blog post, we’ll explore how to use Jira Automation for custom emails, complete with examples inspired by real use cases from the Atlassian Community.
The Power of Jira Automation:
Jira Automation is a feature-rich tool that allows you to automate various actions within your Jira projects. One powerful application of this tool is sending custom emails. Let’s dive into how you can make this happen.
Setting up Automation
Step 1: Access Jira Automation:
1. Navigate to the project where you want to set up custom email automations.
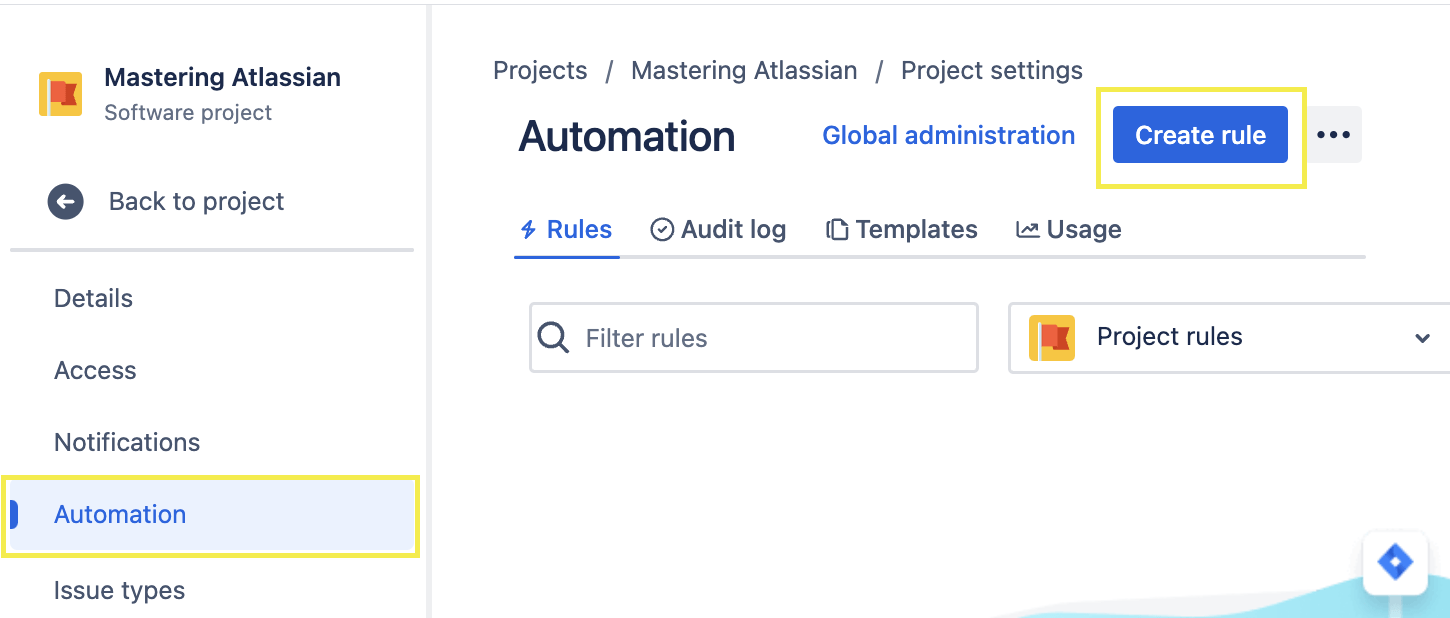
2. Click on the “Project Settings” (cogwheel) icon, and select “Automation.” on the menu.
Step 2: Create a New Rule:
1. In the Automation Rules page, click “Create Rule.”
Step 3: Choose a Trigger:
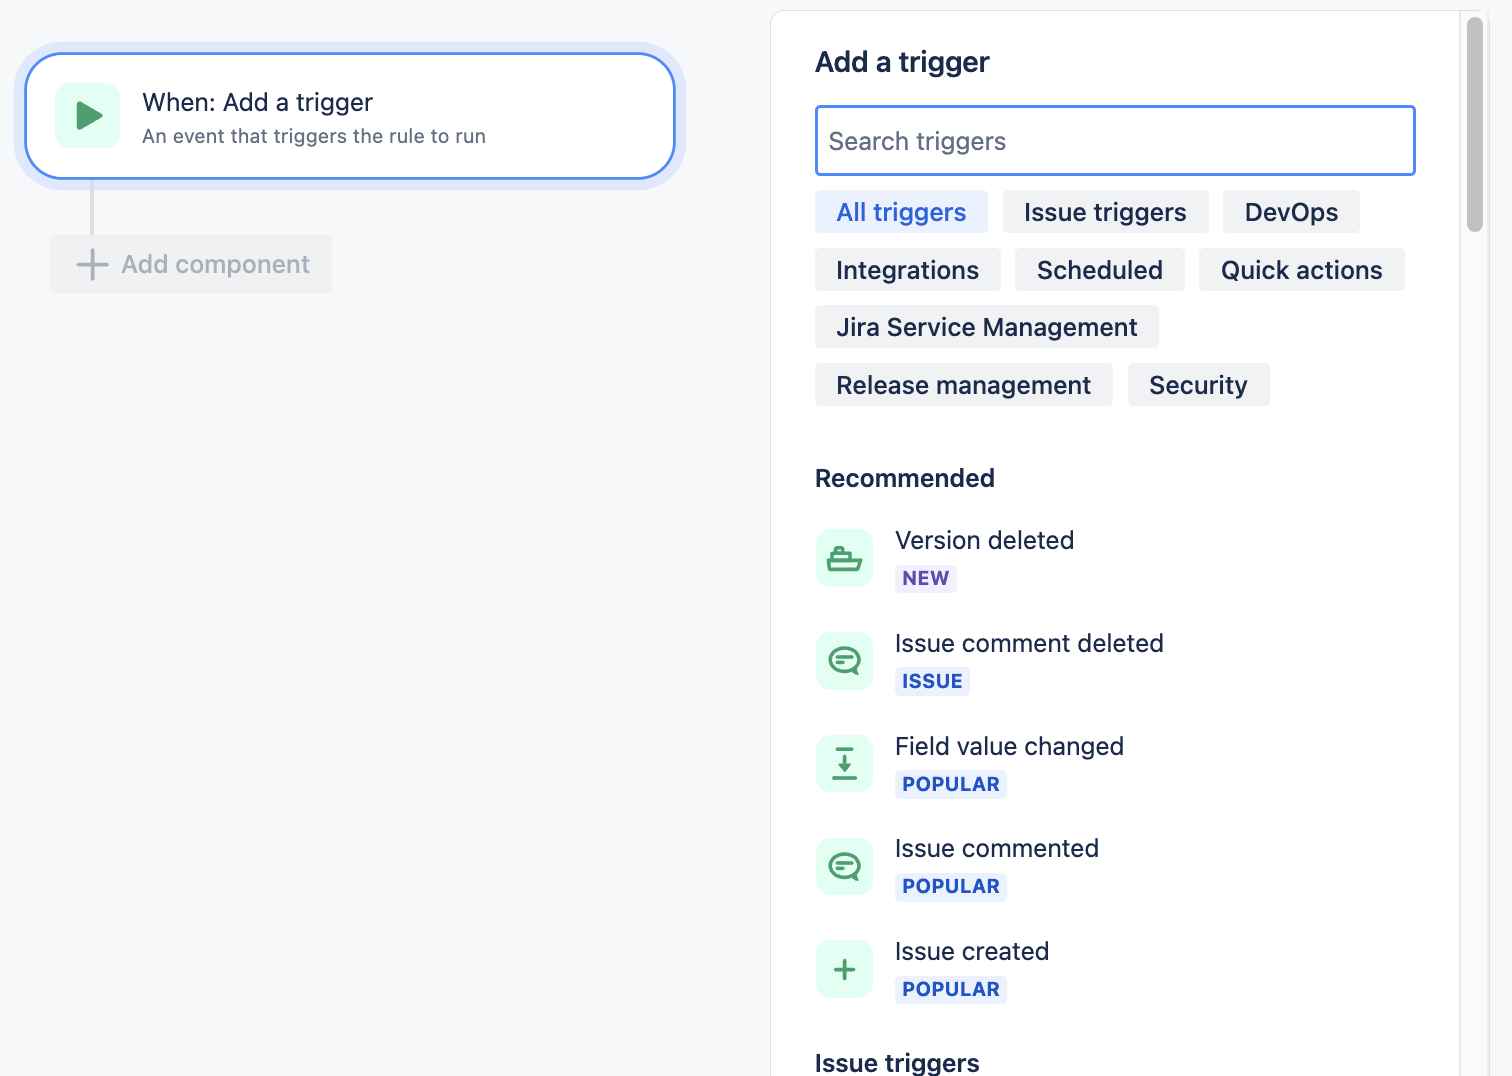
Start by selecting a trigger that defines when the automation should run. Here are some common triggers for custom email automations:
- “Issue Created”: When a new issue is created.
- “Issue Transitioned”: When an issue transitions to a specific status.
- “Issue Field Value Changed”: When a particular field in an issue changes.
- “Scheduled”: On a regular schedule (e.g., daily, weekly).
Step 4: Set Conditions:
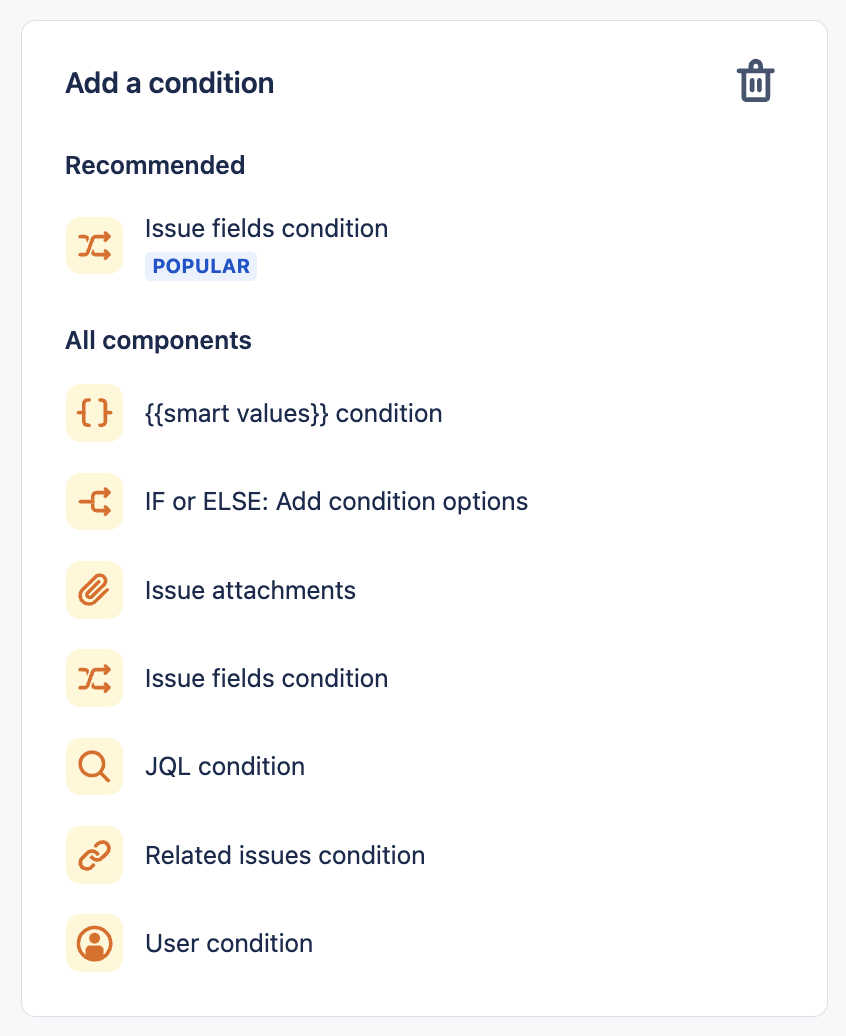
Define conditions that specify which issues should trigger the automation. For example:
- “Issue matches JQL”: Use Jira Query Language (JQL) to filter issues. For example,
"project = MyProject AND issuetype = Bug". - “Issue Type is”: Select specific issue types.
- “Issue is in Epic”: Trigger the automation for issues that are part of a particular epic.
Step 5: Define Actions:
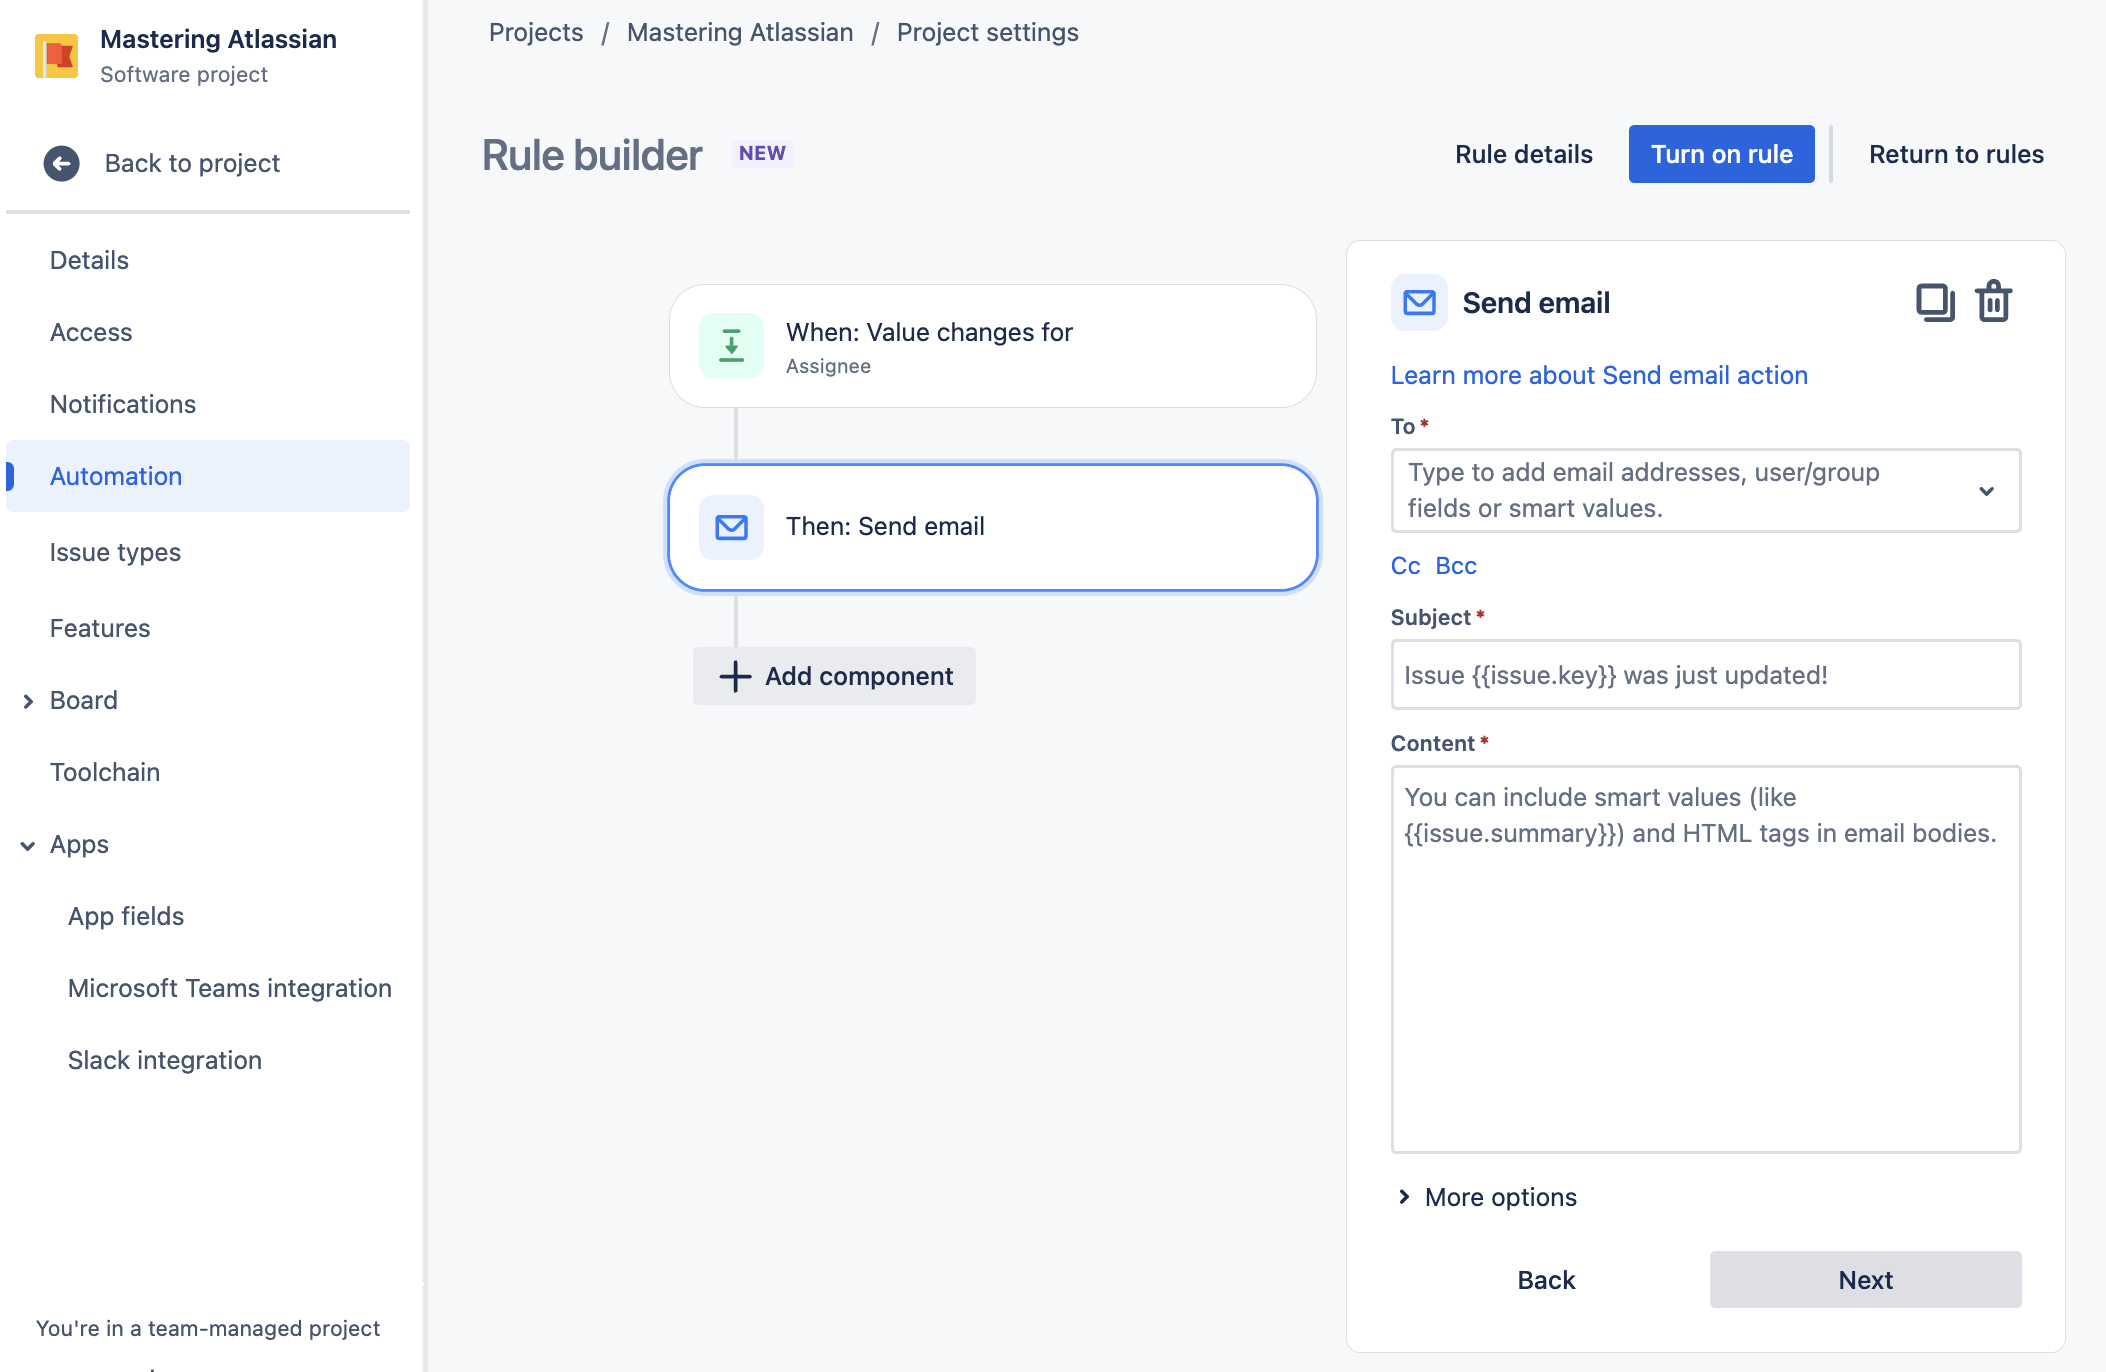
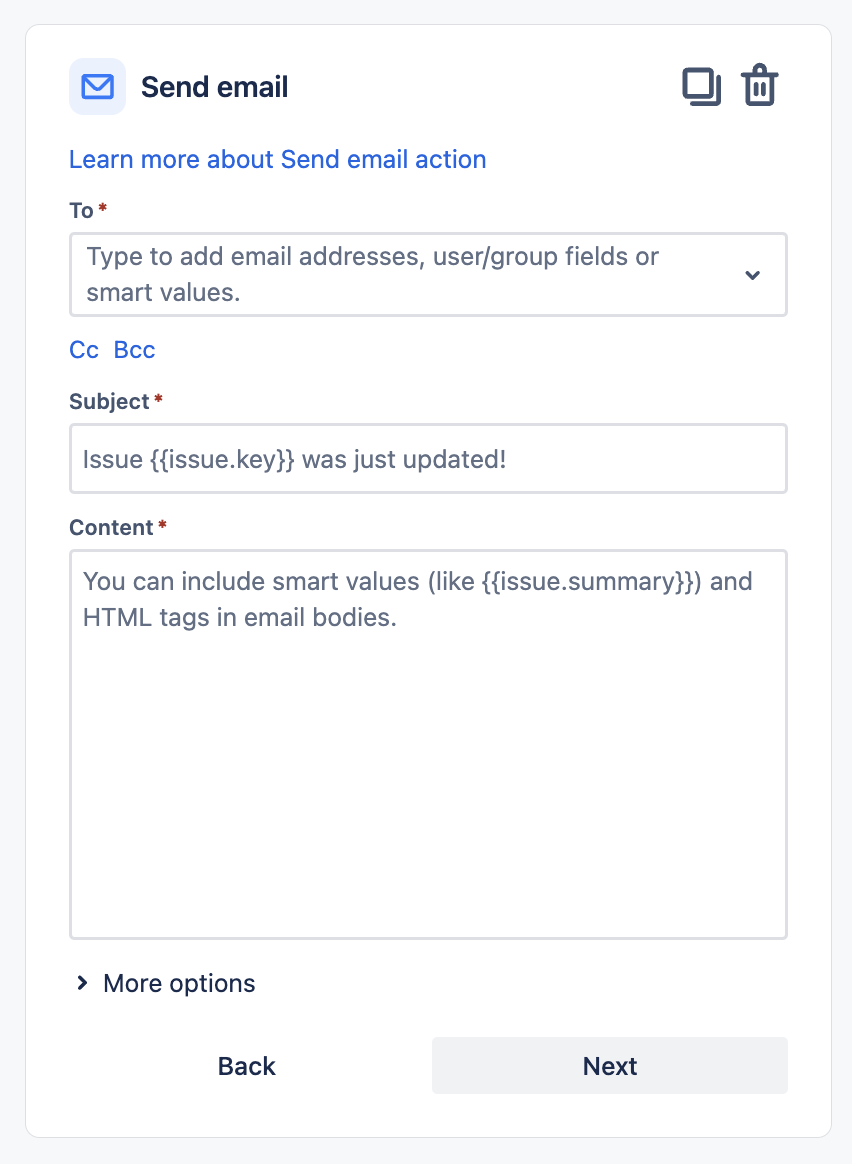
Next, specify the actions that the automation should take. To send custom emails, choose “Send email.” Learn more here from Atlassian.
Step 6: Configure Email Content:
You’ll now have the option to configure the email content:
- Add Recipients: Select who you want to send the email to.
- Subject: Enter the subject line of your email.
- Body: Compose the email body. You can use placeholders like
{{issue.key}},{{issue.summary}}, or custom field placeholders to personalize the email content.- For example,
"Dear {{issue.assignee.displayName}},\n\nThe priority of issue {{issue.key}} has been updated to {{issue.priority}}."
- For example,

Step 8: Test and Save:
Before saving the rule, it’s a good practice to test it. Click the “Test Rule” button to ensure that it behaves as expected. You can test it on a specific issue to see the email content.
Once you’re satisfied with the test results, click “Save” to create the automation rule.
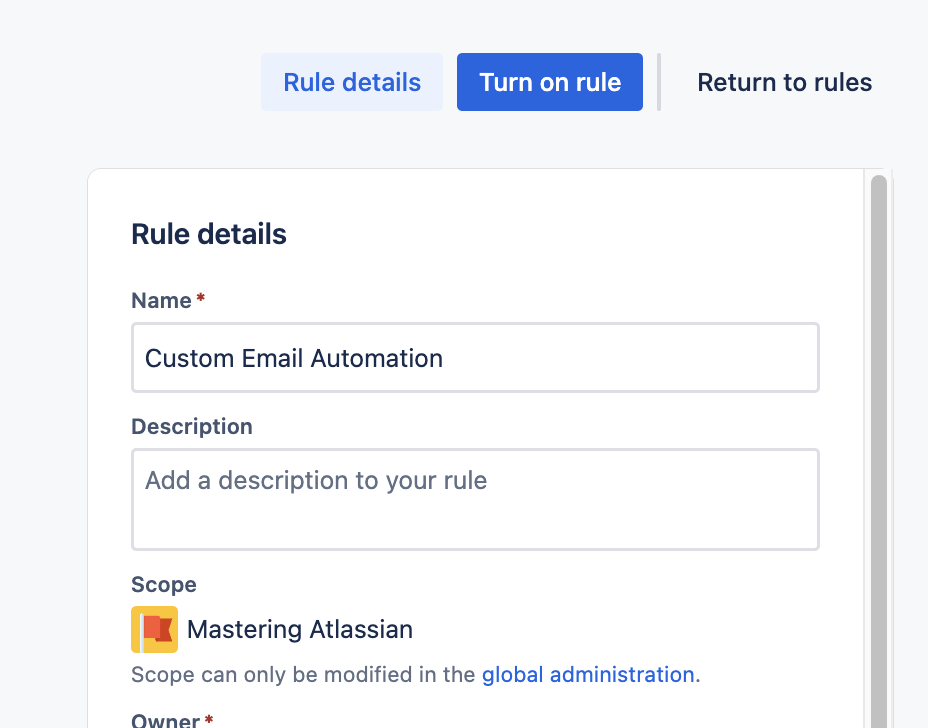
Navigate to “Rule Details” to edit any additional information as needed.
After saving, you’ll need to activate the rule to make it operational. Click “Turn rule on.”
That’s it! You’ve successfully set up custom email automations using Jira Automation. Repeat these steps for each automation rule you want to create to enhance your communication and streamline your project management processes in Jira.

Example Scenarios
Scenario 1: Sending Custom Emails Based on Issue Changes
Imagine you want to notify team members whenever the priority of an issue changes. Here’s how you can set up a Jira Automation rule for this:
Rule Configuration:
- Trigger: Issue Field Value Changed
- Conditions: Issue matches JQL (e.g., “project = MyProject AND issuetype = Bug”)
- Actions: Send email (Custom email content)
Email Content:
- Subject: Priority Update – Issue {{issue.key}}
- Body: Dear {{issue.assignee.displayName}},\n\nThe priority of issue {{issue.key}} has been updated to {{issue.priority}}. Please review and take appropriate action.
This rule will send a customized email to the assignee whenever the priority of a bug issue in the “MyProject” project changes.
Scenario 2: Sending Emails Based on Custom Fields
Suppose you have a custom field called “Customer Contact” that contains the email addresses of customers associated with issues. You want to send these customers regular updates on their issues. Here’s how:
Rule Configuration:
- Trigger: Scheduled (e.g., daily)
- Conditions: Issue matches JQL (e.g., “project = MyProject AND issueFunction in linkedIssuesOf(‘issue in currentSprint()’, ‘relates to’)”)
- Actions: Send email (Custom email content)
Email Content:
- Subject: Update on Your Issue {{issue.key}}
- Body: Dear {{issue.fields.customfield_10000}},\n\nWe want to keep you informed about the progress of your issue {{issue.key}}. It’s currently in the sprint and making steady progress. Stay tuned for further updates!
This rule sends a daily email to the customers listed in the “Customer Contact” custom field for issues linked to the current sprint.
Conclusion:
Jira Automation empowers you to streamline communication by sending custom emails based on your project’s unique needs. Whether you want to notify team members of issue changes or provide updates to customers, Jira Automation offers the flexibility and power to make it happen. With real-life examples and the support of the Atlassian Community, you can harness the full potential of Jira Automation for custom emails, ensuring everyone stays informed and connected throughout your project’s lifecycle.
If you found this useful check out this article from Atlassian too!
Thanks for visiting, click here to learn more about out our Atlassian Cloud Services!
