
Jira Forms and Conditional Fields
In the world of project management and issue tracking, the ability to tailor forms to specific needs is invaluable. Jira Cloud’s form feature allows for dynamic customization, particularly through conditionally showing and requiring fields based on the selections of other visible fields. This capability ensures that users provide all necessary information, tailored to the context of each issue or task, enhancing efficiency and accuracy in project management.
In this blog post, we’ll walk through an example of creating a Jira Cloud form with at least two select lists. These lists will conditionally reveal additional fields depending on the options chosen, illustrating the power and flexibility of Jira’s form customization. By the end of this walkthrough, you’ll have a clear understanding of how to implement conditional logic in your Jira forms, ensuring that your team captures the right information at the right time for every task.
Step 1: Access Your Project Settings
- Login to Jira Cloud: Start by logging into your Jira Cloud account.
- Navigate to Your Project: Choose the project where you want to create or modify a form. Note that forms are only available on Service Projects
- Open Project Settings: Click on the ‘Project settings’ option, usually found at the bottom of the project menu on the left-hand side.
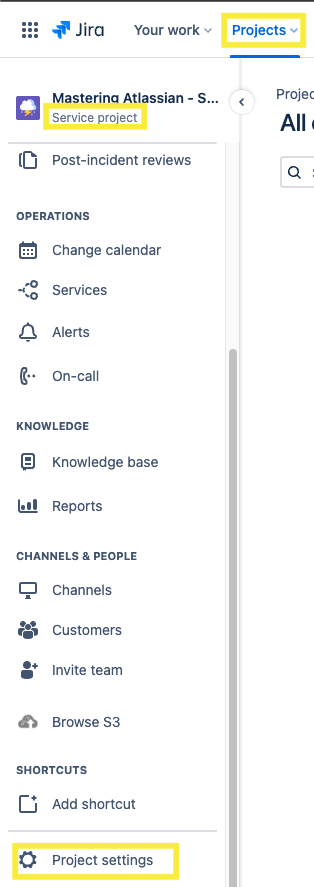
Choose your Service project from the drop-down menu at the top. Then, proceed to “Project Settings” located on the sidebar of the page. Please be aware that access to this setting requires you to have Admin privileges for the project.
Step 2: Create or Edit a Form
- Access Forms: Within project settings, find and click on the ‘Forms’ section.
- Create/Edit Form: Choose to create a new form or edit an existing one by selecting the respective option.
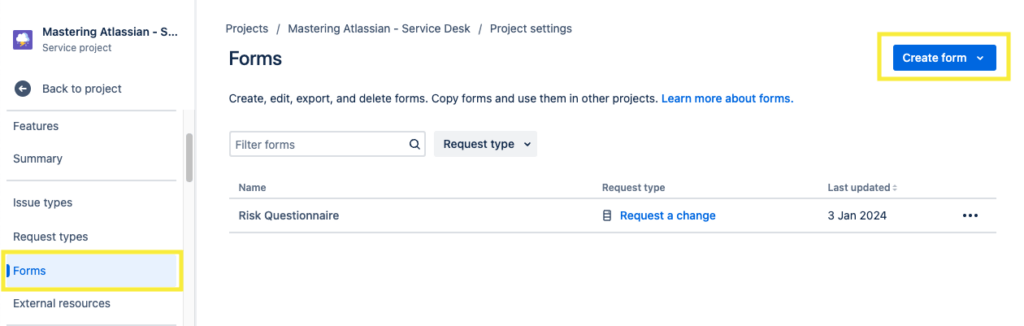
When initiating a new form, you’re presented with three choices: begin with a blank form, modify an existing one, or utilize an Atlassian Preset template.
Step 3: Add Always Visible Fields
- Insert Select Lists: Drag and drop two custom fields from the field options onto your form. These will be your always-visible fields that users will interact with.
- Configure Options: Click on each select list to add options in the menu to the right of the screen when the field has been clicked.

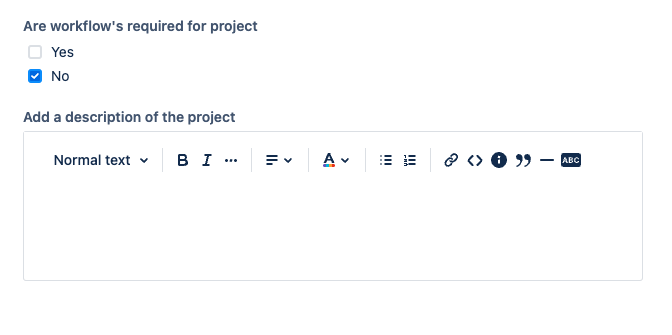
In the example form shown above the always-visible fields include Radio buttons (Yes/No) for “Are the workflows required from project?” and a Paragraph field for “Add a description of the project.” Field are edited in the pop up menu to the right of the screen when the option has been selected.
Step 4: Set Up Conditional Fields
- Add Conditional Fields: Now, add fields that you want to show conditionally. This could be additional information or context-specific fields.
- Add Sections: To implement your conditional fields, add sections above and below the fields you wish to reveal conditionally. This delineates the start and end of the section clearly, indicating exactly where the conditional fields will appear within the form.
- Apply Conditions: Click on the conditional field to set up its visibility conditions. You’ll need to specify that this field should only show if a certain option is selected in one of the always visible fields.
- Mandatory Fields: Decide if the conditional fields should be mandatory (required) when they do appear. You can toggle the ‘Required’ option on the field settings.
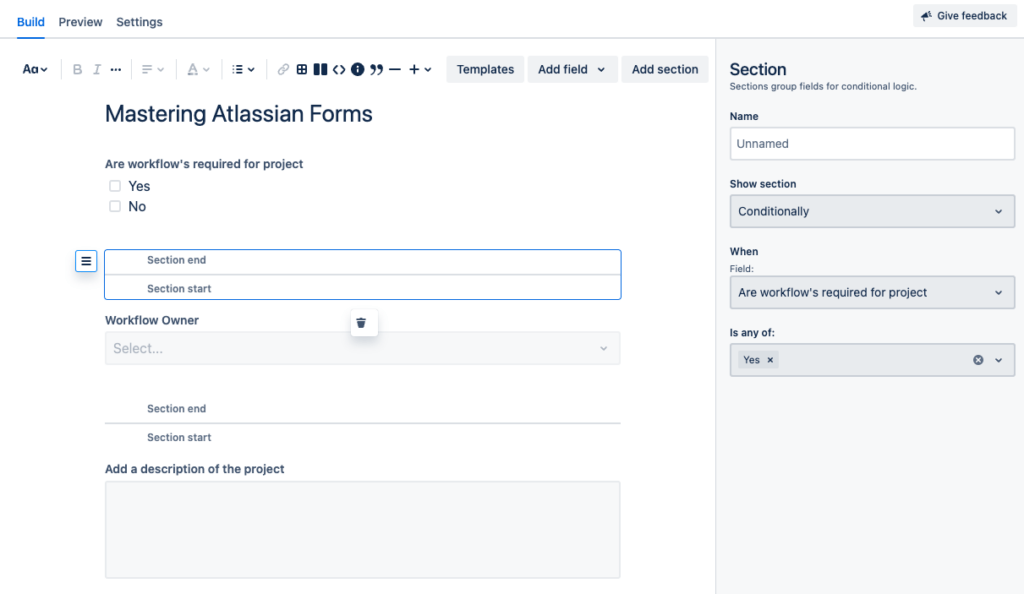
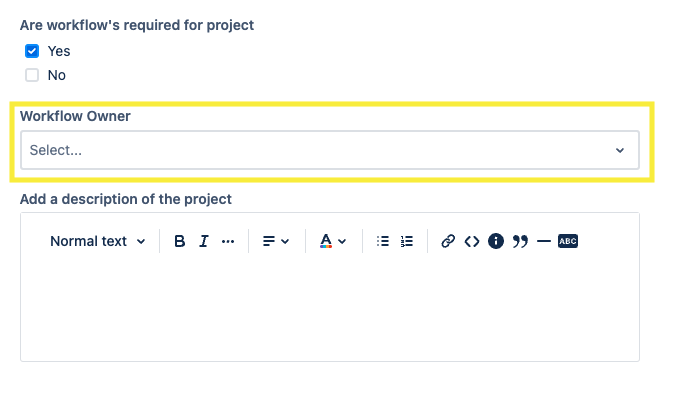
In our example, we’ve set a conditional field linked to the Yes/No Radio button. Specifically, when “Yes” is selected, a previously hidden field labeled “Workflow Owner” becomes visible. This field is configured to display only if “Yes” is chosen, remaining hidden if “No” is selected.
Step 5: Test Your Form
- Preview and Test: Before making the form live, use the preview option on the top of the form to test the form’s functionality. Ensure that the conditional fields appear as expected when you make different selections.
- Iterate as Needed: If something doesn’t work as expected or could be improved, go back and edit the form until it meets your needs.
Step 6: Publish and Implement
- Save and Publish: Once satisfied with the form, save your changes and publish the form.
- Inform Your Team: Let your team know about the new form and any specific instructions on how it should be used.
By following these steps, you will have created a dynamic form in Jira Cloud that intelligently displays and requires information based on user input. This approach not only makes the data collection process more streamlined and efficient but also ensures that the information is relevant and comprehensive, leading to better management and resolution of tasks and issues.
If you found this useful check out this article from Atlassian too!
Thanks for visiting, click here to learn more about out our Atlassian Services!