Blog Summary
Jira Automation offers a powerful toolkit for enhancing your project management workflows. In this blog post, we’ll explore a crucial aspect of Jira Automation – preventing and reverting field changes. We’ll delve into practical examples and real-world use cases to illustrate how you can leverage automation rules to maintain data integrity and streamline your Jira processes.
One of the main tools in your arsenal is Jira Automation, which allows you to automate repetitive tasks, enforce data validation, and ensure that field changes adhere to your defined rules. Let’s look into how you can harness the power of automation to prevent and revert field changes in Jira.

How to set up your Automation
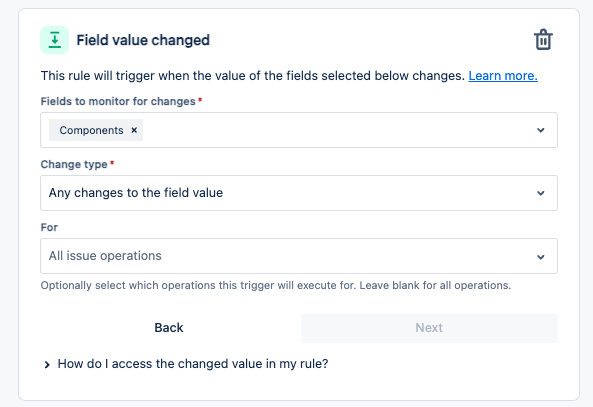
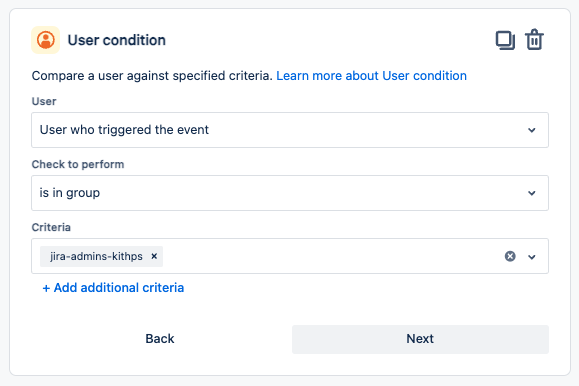
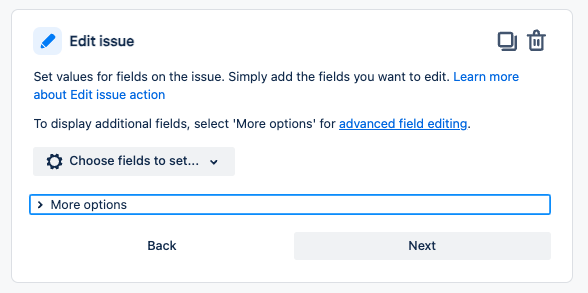
While Jira lacks a built-in feature for blocking certain field modifications, you can achieve this functionality by leveraging Automation Rules. With Automation Rules, you can establish a system that automatically reverts the change immediately after it occurs. Below are examples on how to set it up.
Gettings started with the automation
Conclusion:
Leveraging automation to revert fields in Jira offers several benefits, including maintaining data integrity, streamlining workflows, and reducing manual effort. By configuring Automation Rules to intercept and revert changes made to specific fields, organizations can ensure that data remains accurate and consistent. Additionally, automation helps enhance user experience by providing seamless and immediate feedback when invalid changes are detected. Overall, embracing automation for field reverting not only improves efficiency but also contributes to a more streamlined and reliable project management process in Jira.
If you found this useful check out this article too!
Thanks for visiting, click here to learn more about out our Atlassian Cloud Services!
